
You already know what it feels like to walk into a messy garage that looks confusing. When a small garage has no real system, you look for your stuff but can’t find it because they are hidden somewhere in the garage.
This guide is about fixing that. With a real and practical approach, you can follow and organize that small garage.
Why does your small garage look messy?
Your small garage is messy because it lacks a real system. Most of the time, the problem is not that you are disorganized; it’s because the garage has become the room where things go when they don’t have anywhere else to go. And now, you are frustrated.
The simple solution to this is to create a space where all items and tools live and you get used to. Even in the dark, you can pick whatever tool you need and return it to its place.
Below are the exact steps and process to follow.
How to organize a small garage, step by step.
Step 1: Get Everything Out. Yes, Everything.
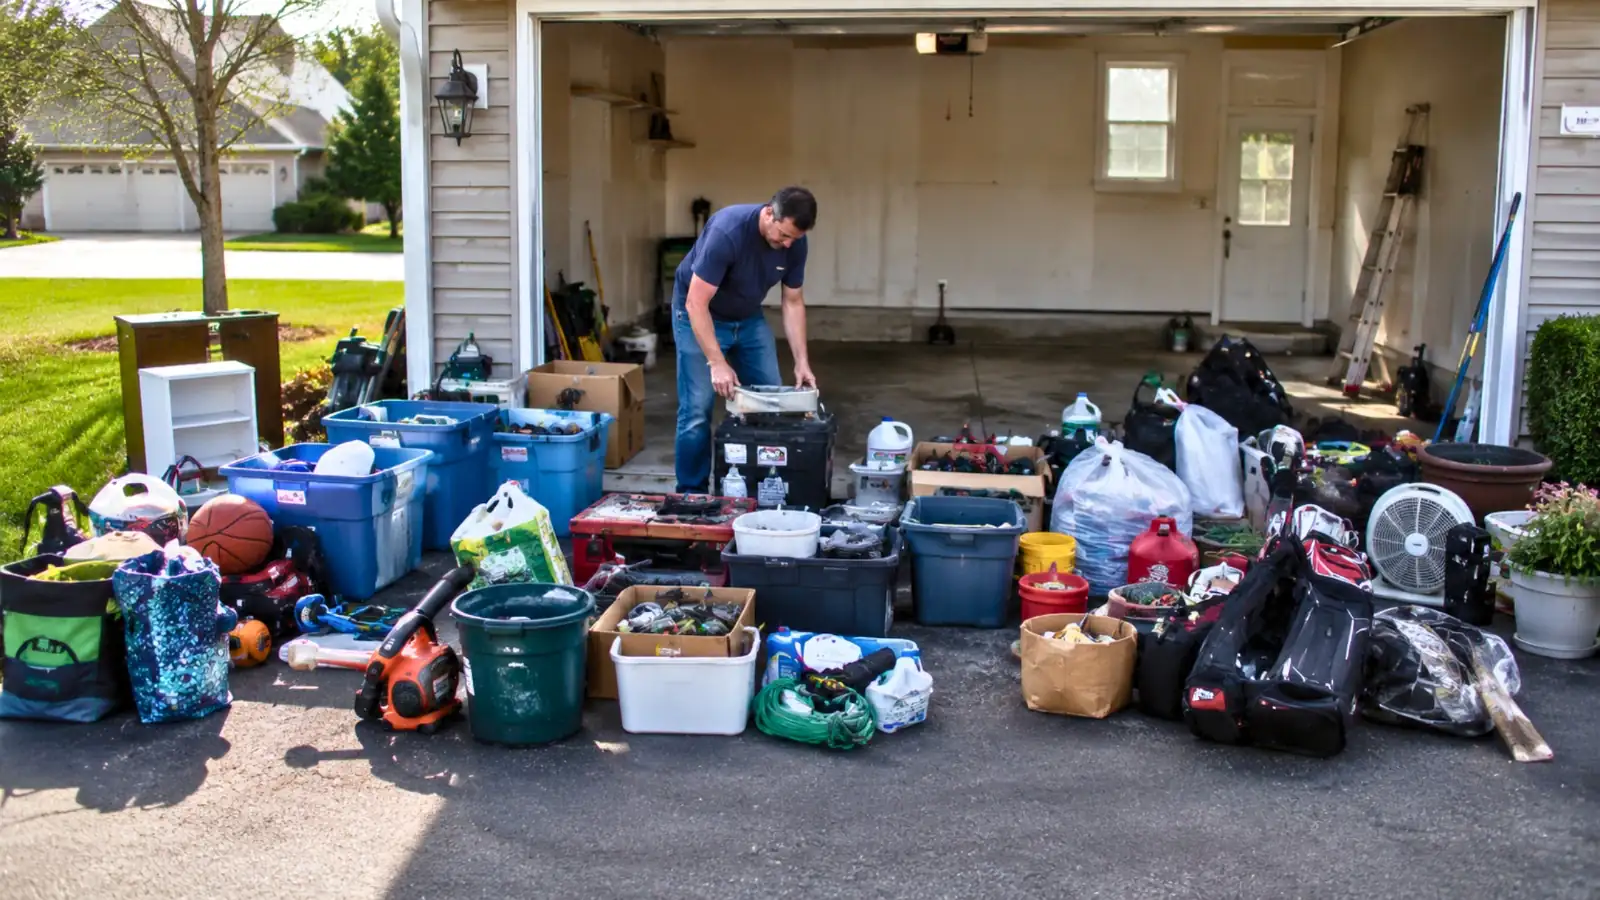
The first mistake you make when trying to reorganize a small garage is when you start looking for a way to shuffle things around inside a chaotic garage. Pull every single thing out with no consideration!
Lay it out on your driveway or lawn where you can see everything at once. Then sort it into four piles:
- Keep items you’ve used in the last 12 months and will use again
- Donate or sell items that you no longer need but are in good condition.
- Trash broken, expired, or not worth donating items
- Relocate things that belong somewhere else in the house instead of the garage
Most importantly, you want to ensure a clean space. Sweep and clean the garage floor before anything goes back in.
Step 2: Decide What Each Area of Your Garage Is For
Before you carry anything back in, you’re going to decide where things live, not just where they fit. Use the following system to save stress and time.
Zone the garage into four (4) sectors:
- The tool zone
- The vehicle zone
- The wall zone
- The seasonal zone
The tool zone: This is where your toolbox, workbench, and hand tools live. It should be the most accessible spot in the garage, ideally with decent lighting because this is where you’re going to be doing actual work.
The vehicle zone: This is your floor space. The goal is to keep it as clear as possible. Every bin that creeps onto the floor eats into the space your car needs and makes the whole garage feel tighter than it is.
The wall zone: This is where you’re going to reclaim space. Walls in a one-car garage are almost always empty from about four feet up to the ceiling. That’s free space, it’s doing nothing!
The seasonal zone: Holiday boxes, camping gear, the stuff you use once or twice a year. This goes in the back corner, overhead, or wherever is not in the way. Accessible, but not prime space.
When you carry things back in, every item gets assigned to a zone. Don’t think “I’ll figure out where this goes later.” That’s how the piles come back.
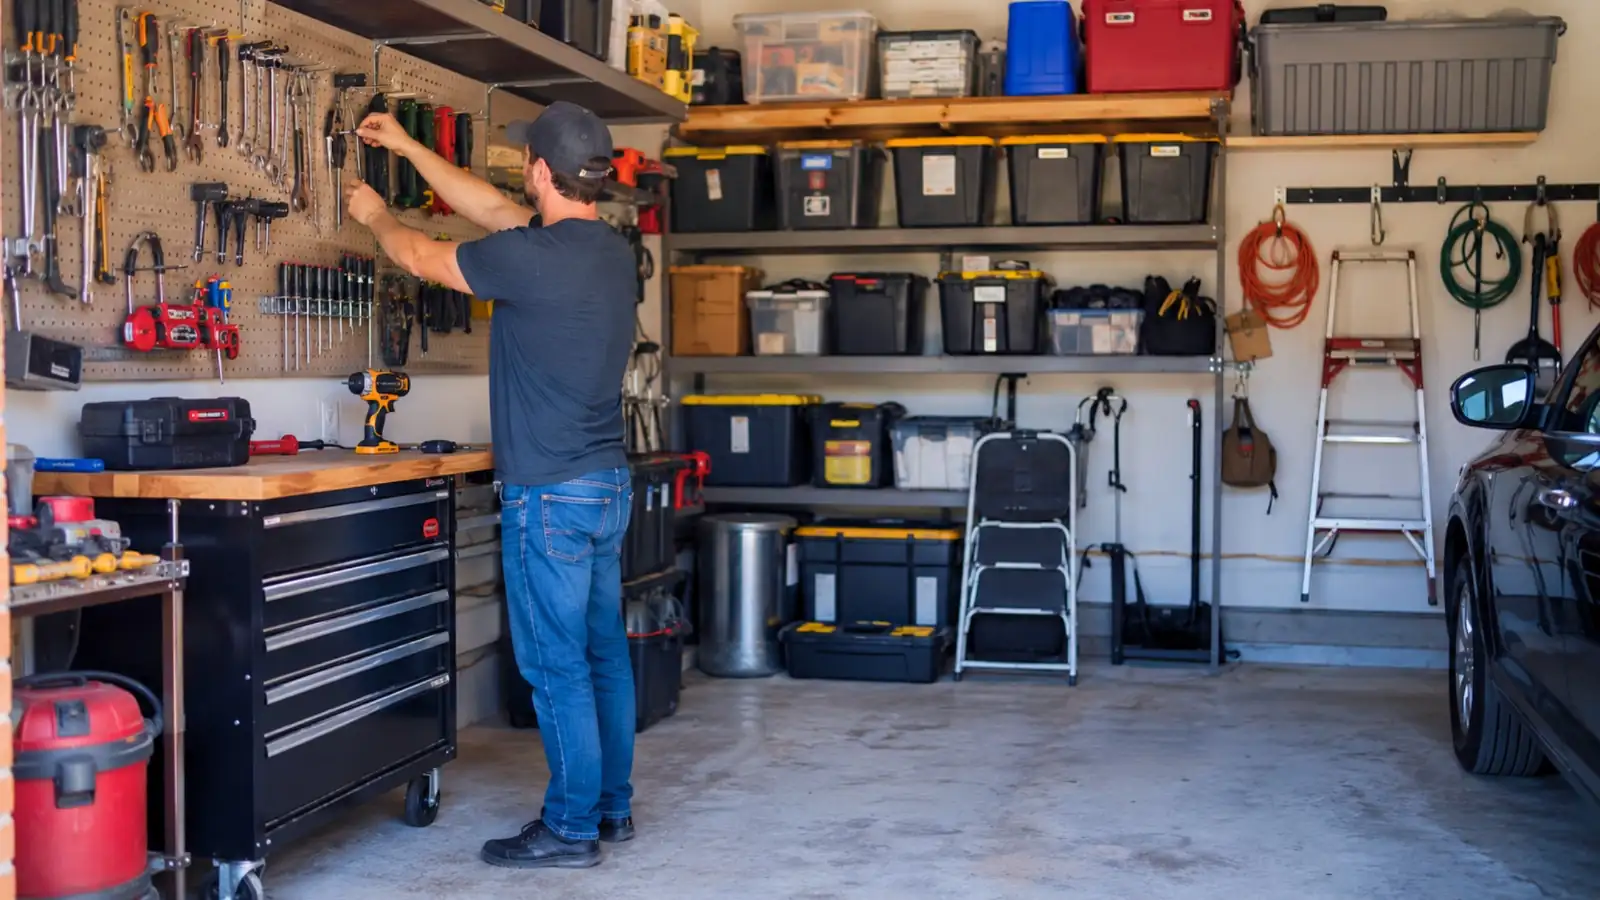
Step 3: Use Your Wall Space

The whole idea of a perfect small garage organization is how well the owner is able to manage the spaces available on the walls. Floor space is limited. Ceiling height is usually not advisable. And walls are almost always completely wasted in a small garage.
A pegboard on your main tool wall might be the single best thing you can do to maximize your small garage space. Here’s what I mean: instead of opening four drawers looking for your pliers, you hang them on the wall. That way, you can see every tool at once.
This simple hack will also help to detect immediately something’s missing, and your workbench top stays clear so you can actually use it.
Wall-mounted shelving handles the stuff that needs to be accessible but doesn’t need to be at arm’s reach. For oddly shaped things like extension cords, hoses, and bungee cords, a slat wall or rail hook system is genuinely useful. The hooks are rearrangeable, so you can shift your storage or adjust it when needed.
We also have the overhead storage. A ceiling-mounted storage rack anchored to the joists can hold seasonal tires, camping bins, holiday totes, and all the stuff that you only need a couple of times a year. Now, you’ve got a reasonable floor space to work with.
Step 4: Sort Out Your Tool Storage Specifically
Small garage tool storage is worth its own section because tools have a way of spreading everywhere if you don’t give them a home with some structure to it.
Start with your toolbox. The mistake most people make is organizing by size. Big tools in one drawer, small tools in another. It makes sense until you’re in the middle of a job and you’ve got sockets in two different drawers and you can’t remember which is which.
Organize by function instead. Sockets together. Wrenches together. Screwdrivers together. Pliers together. Electrical stuff together. When tools live with the other tools, they work alongside one another.
If you want the full process for this, our guide on organizing your toolbox step by step walks through it in detail with images.
For knowing how to store tools in a small space more broadly, the rule is: daily-use tools go on the pegboard or in easy-access drawers. Specialty tools that come out occasionally go deeper in the tool chest. Power tools get shelf space or stay in their cases, not on the bench. We’ve got a full breakdown on how to store power tools the right way if you want to go deeper on that.
Step 5: Label Everything.
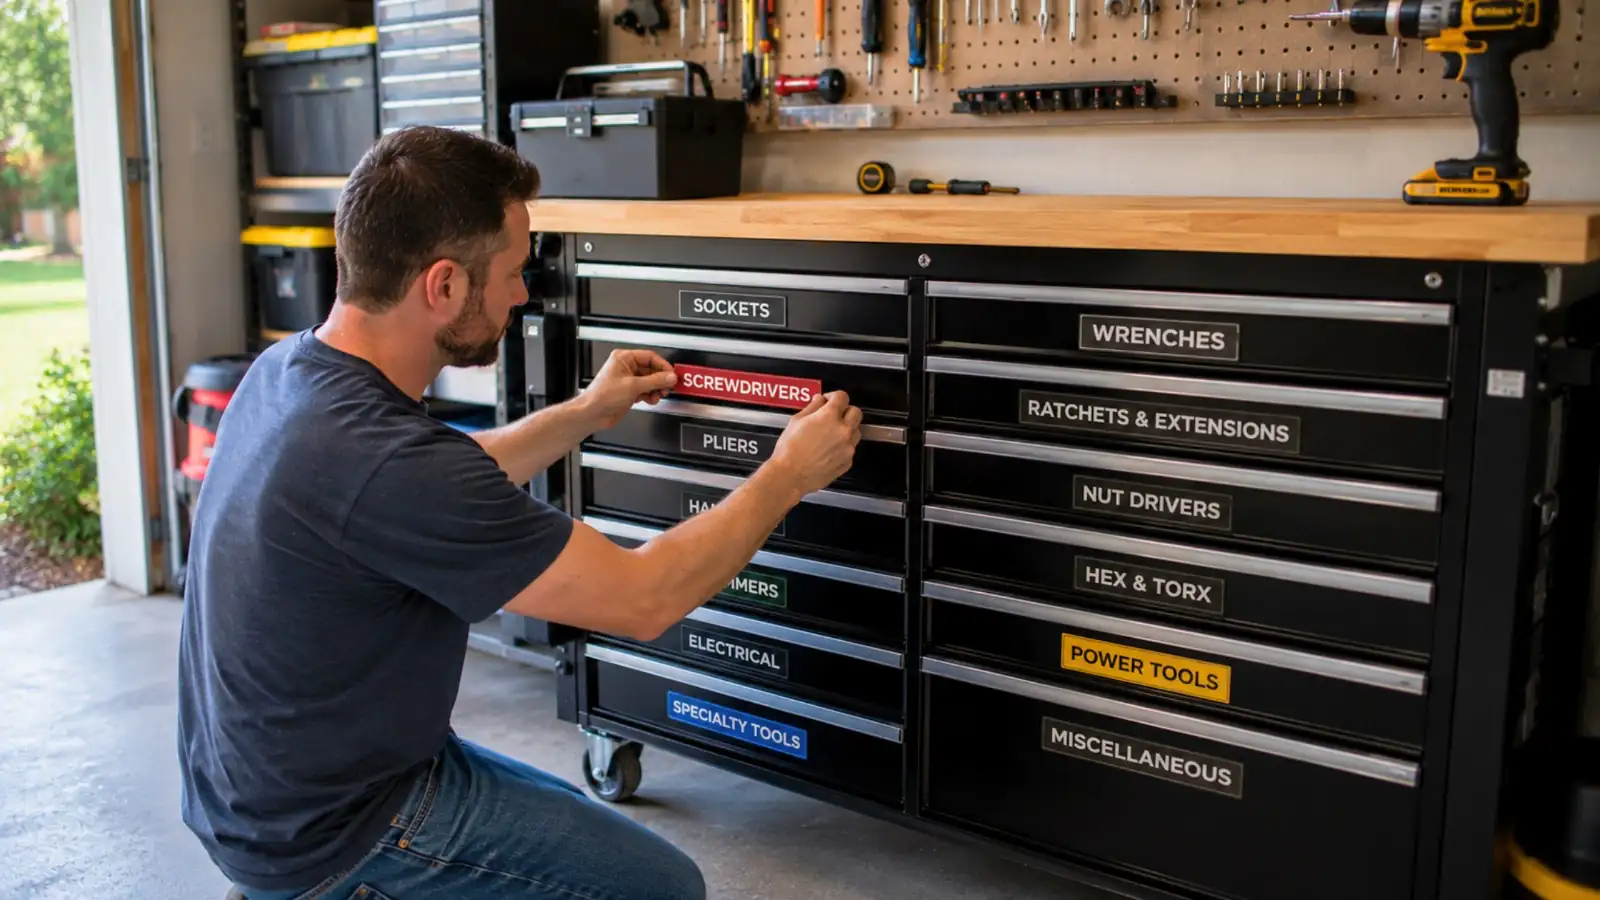
You can do everything in this guide perfectly, and the garage will still drift back into chaos within two months if you skip this step.
Labels are what turn a one-time organizing session into a system. Without them, things get put down wherever there’s a gap instead of wherever they belong. With them, the right place is obvious. Not just to you. To your partner, your kids, whoever else uses the space.
Label every toolbox drawer. When every drawer says exactly what’s in it, you stop guessing, and you stop putting things back in the wrong place out of convenience. If you’re not sure how to approach this well, our post on how to label toolbox drawers the right way covers the different options.
Get the Perfect Label
Label every storage bin. A label on the front takes 30 seconds and saves you five minutes of digging every single time you need something.
Label your pegboard zones, too. Mark which hook belongs to which tool, either with an outline or a small label nearby. When the socket set isn’t back in its spot, you know before you need it, not while you’re hunting for it.
For the toolbox specifically, printed magnetic labels are worth a look as a clean option with no adhesive mess.
Step 6: Finish the Toolbox the Right Way
There’s a version of an organized garage that’s functional and a version that’s functional but doesn’t last. The difference is usually the labels on your toolbox drawers.
Before you consider buying the tool chest label, it is important for you to be clear which one to go for. There are many labels out there, and they include:
- Generic adhesive label
- Label maker tape
- Custom magnetic labels
Generic adhesive labels peel within a year. Label maker tape looks fine for the first few months, then starts curling at the corners. If you’ve put real effort into the rest of the setup, it’s worth finishing it properly.
The Custom Magnetic Toolbox Drawer Labels is the best type of label you can use. You get to pick the text, the font, and the color, so they actually match your setup. They come as a set of 8, which covers most full-size tool chests.
The magnetic backing holds firmly and doesn’t leave any marks if you rearrange drawers later, which you probably will as the system evolves.
They’re made from durable PLA, designed in Canada, and ship free to Canada, the USA, and Australia. At CAD $39.99 for the set, it’s a small price for something you’re going to look at every time you open the chest.
Step 7: Build a Maintenance Habit
The hardest part of garage organization for a small garage isn’t building the system. It’s making sure the system survives for a long period of time.
One rule handles most of it: everything goes back in its respective places before you close the garage door.
That’s it. That single habit prevents 90% of the drift that turns an organized garage back into a mess.
Beyond that, a quick 15-minute walkthrough once a month will help sustain the organized garage. Return anything that’s drifted, clear the flat surfaces, including workbench tops and floor near the door.
Twice a year, take a fresh look at the seasonal zone. Anything that hasn’t been touched in 12 months probably doesn’t need to stay.
A Quick Checklist Before You Start
- Pull everything out before you organize anything
- Sort into keep, donate, trash, and relocate piles
- Clean the floor before anything goes back in
- Define your four zones before you carry a single thing back in
- Mount the pegboard on the main tool wall
- Add wall shelving for bins and supplies
- Set up overhead storage for seasonal and bulky items
- Organize toolbox drawers by function, not size
- Store power tools off the bench
- Label every drawer, bin, shelf, and pegboard section
- Add custom magnetic drawer labels for a clean, lasting finish
- Commit to the “everything goes back before the door closes” rule
Conclusion
Figuring out how to organize a small garage is not about buying a bunch of storage products. Effective garage organization, as explained in this guide, is what matters.
Do that once, maintain it with one simple habit, and the garage stops being the most stressful room in the house.
Want to finish it off with custom drawer labels that actually look good? Check out our Custom Magnetic Toolbox Drawer Labels. Fully personalized, magnetic, and free shipping to Canada, the USA, and Australia.