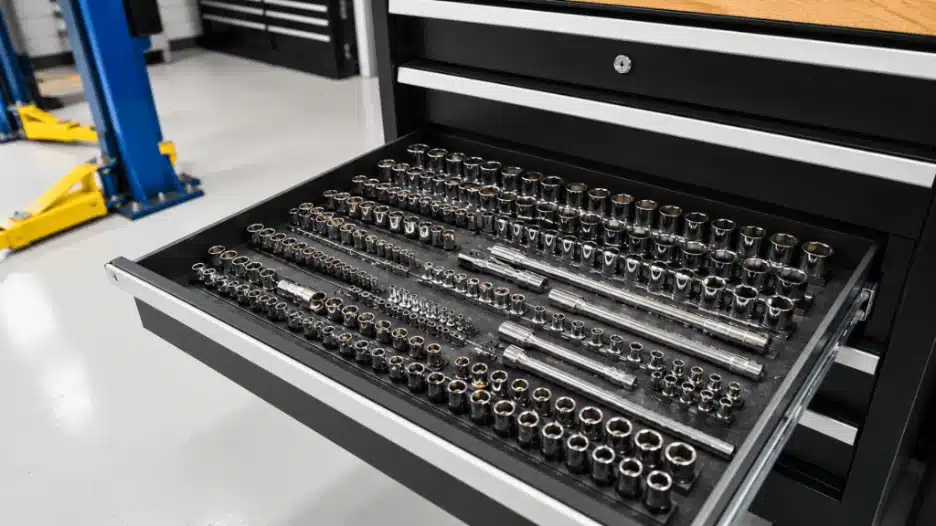
There are tons of different ways to organize your socket in your toolbox. It’s personal anyway. Some people may store because it looks cool in a certain way, some may store for efficiency, while others do not care. If you are one of those who care, this guide is for you!
How To Organize Sockets: What You Need to Know First
Before touching a single drawer, there are certain things you need to ensure.
SAE sockets are measured in fractions of an inch (1/2″, 1/4″, 3/8″, 7/16″, and so on). Metric sockets are measured in millimeters (8mm, 10mm, 12mm, 13mm, 14mm).
Whether you use SAE or Metric sockets, these two groups should never share the same storage row. Ever!
This single rule alone will save you more time than anything else in this guide.
You also have three drive sizes.
The drive is the square opening at the top of the socket that connects to your ratchet. There are three standard sizes: 1/4-inch drive for small, tight-space work; 3/8-inch drive, the workhorse size most people use daily; and 1/2-inch drive for heavy-duty work like lug nuts and suspension bolts.
A 3/8-drive socket will not fit a 1/2-drive ratchet. So mixing drive sizes in the same section is how you end up picking up the wrong socket and losing another 30 seconds you didn’t have.
What you want to have ready before you start: Socket Organizers and More
- A flat surface to spread everything out on.
- A trash bag for any socket that’s cracked, stripped, or one you genuinely cannot identify.
- 5 minutes to an hour.
- Grab your labels before you start.
- Grab your socket organizers before you start.
This guide on which toolbox labels are actually worth buying will help you decide before you get started.
Steps to Organize Sockets Effectively
Step 1: Pull Everything Out
Get every socket out of the tool box and onto a flat surface, including any loose sockets. All of them. Don’t organize in place. That’s the mistake most people make. You move things around, it looks slightly neater, and a week later, it’s exactly as bad as before because you never actually dealt with what was in there.
Dump it all out. This is the first step in proper socket organization when you need to sort sockets. You need to see the full picture before any decision makes sense.
Step 2: Split SAE and Metric Into Two Separate Piles
This is the first and most important sort. Pick up each socket, check the stamp on the side, and put it in one of two piles. If it reads in fractions, it’s SAE. If it reads in millimeters, it’s metric. Keep these piles apart.
If you find sockets you genuinely cannot identify, no stamp, no marking, corroded past reading, you should set them aside.
Step 3: Sort Each Pile by Drive Size
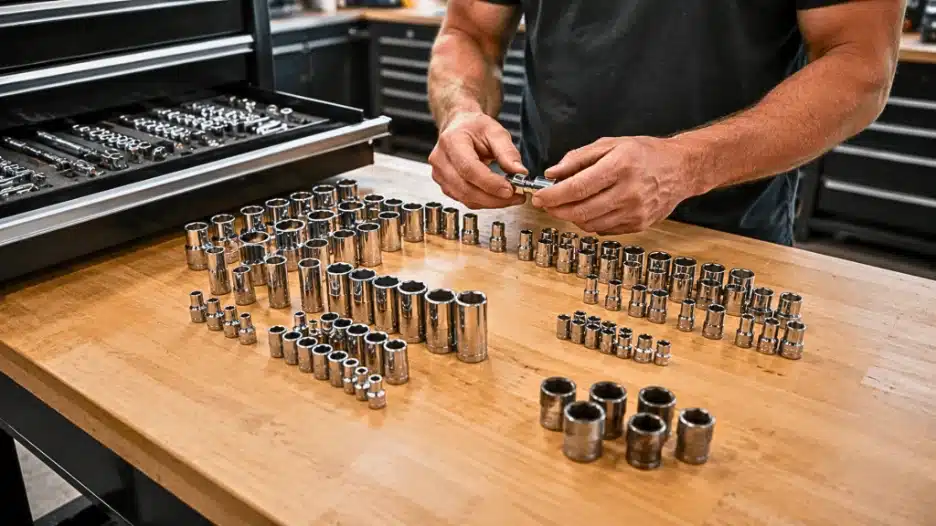
Now, split each pile again by drive size. This is the step where you organize sockets by the square hole at the top. If you’re not sure which is which, a 1/4-inch drive is noticeably small, a 1/2-inch drive is noticeably larger, and a 3/8-inch drive is right in the middle.
Most ratchet sets are labeled, too, so hold the socket against your ratchet to confirm.
By the end of this step, you should have up to six groups. This gives you a complete map before they go back into storage. SAE 1/4 inch, SAE 3/8 inch, SAE 1/2 inch, Metric 1/4 inch, Metric 3/8 inch, and Metric 1/2 inch. That’s your map. Everything that goes back into the toolbox follows those six categories.
Step 4: Choose Your Socket Storage Method
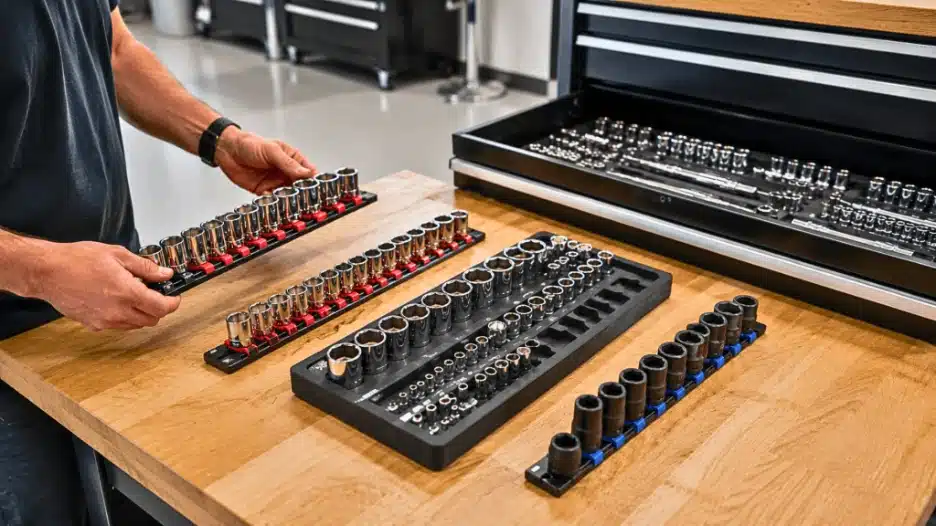
There are three real options here, and each one suits a different situation. You don’t have to pick just one, either. Many good setups use two of these together. Socket organizers usually come in three main types: socket rails, socket trays and a clip organizer.
Socket rails are long strips with spring clips, each holding one socket. The socket snaps into place when you push it in, and it won’t move when you quickly open the drawer or move the toolbox.
The big advantage is speed. You can see every single socket at a glance and grab exactly what you need in a motion. Rails are best for your 3/8-inch drive sockets, since those are the ones you reach for most. For materials, aluminum rails are a more durable metal option, while plastic rails are a lighter conventional choice.
Socket trays are foam or plastic inserts with individual cutouts for each socket size. Here, every socket sits in its own molded holes in plastic trays for easy identification.
The thing I like most about trays is that an empty hole tells you something is missing without you having to count anything. That kind of visual feedback matters when you’re in the middle of a job.
Trays work well for 1/2-inch drive sockets and deep sockets you use less often, but still need to find quickly. Deep well sockets often need taller storage spots than standard sizes.
Clip organizers are compact, handheld holders designed for portability. If you regularly carry a set of sockets to the vehicle instead of working at the toolbox, clips are the right choice. They are portable enough to be carried in a tool bag or truck.
That way, you can grab the clip, bring the sockets with you, and put everything back when you’re done.
Step 5: Map the Socket Drawer Layout Before Anything Goes Back In
Decide which group goes in each socket drawer before you start loading so your socket storage stays easy to maintain. A bad layout can create wasted space and make the setup use too much space.
Here’s the logic to follow:
- Your most-used sockets go in the most accessible drawer, usually the top drawer or whichever one you can reach quickly without bending. That’s almost always your 3/8 inch drive collection. Metric on one rail, SAE on another, both in the same drawer but clearly separated, and rails or socket holders in that top drawer help sockets stay put when that drawer opens.
- Your 1/4 inch drive sockets can share a drawer since they’re smaller and used less frequently.
- Your 1/2-inch drive sockets and deep sockets go in the lower drawer. They’re the tools you need occasionally, not constantly, so the storage there should be compatible with deep sockets and deep-well pieces
If your toolbox has a top tray, only your most frequently grabbed sockets earn that spot. Deep sockets, impact sockets, and specialty sizes go lower.
The same thinking that applies when you organize your full toolbox step by step also applies here. Frequently used tools should be within reach.
Step 6: Load Everything Back In, Smallest to Largest
Once the layout is mapped, load each group back in size order, attaching each socket so it clicks or locks onto the rail before you place the loaded rail back in the drawer. Smallest at the front or left, largest at the back or right. On a rail, make sure the size stamp on each socket faces up toward you when the drawer is open so you can read it without picking anything up, and use sliding clips if your rail style lets you adjust positions.
This may sound like a small thing, but it actually affects how fast you work. When sockets are in order, your eyes immediately go to roughly the right spot. You’re not reading every single one. You scan to where the 13mm should be, and you’re done.
One thing worth separating out at this stage: impact sockets. They’re typically black rather than chrome, and they’re rated for power tools, unlike chrome sockets. Keep them on their own rail or in their own tray section. Keep in mind, using a chrome socket with an impact driver is a safety issue, not just an organizational preference, so the separation matters beyond just keeping things neat.
Step 7: Label Every Section
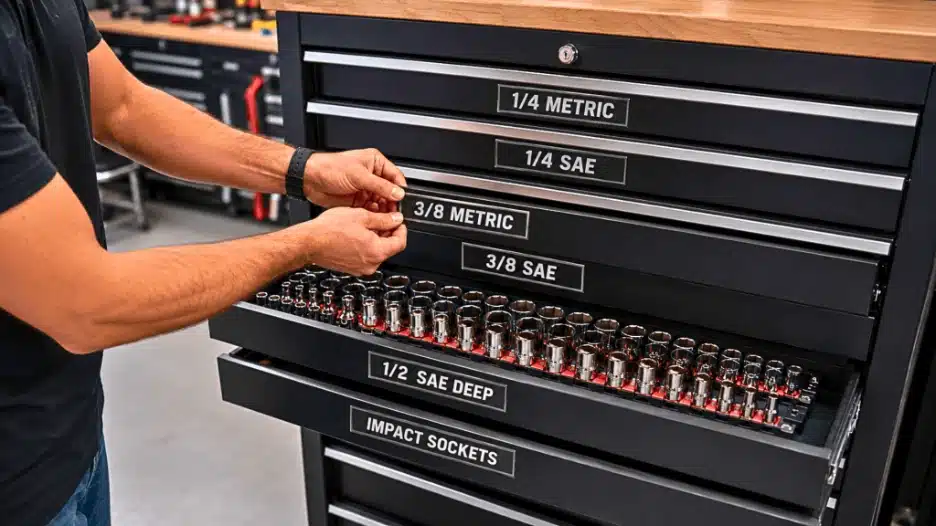
This is the step that determines whether your system will last.
What happens without labels is predictable. After organizing everything, it looks great. Then, a few weeks later, stuff will start landing in the wrong spot. One socket in the wrong drawer becomes five; slowly, the system undoes itself.
Labels kill that problem. When the drawer says “3/8 Metric” and the one next to it says “3/8 SAE,” there’s no ambiguity, just easy identification. The tool goes back where the label tells it to go.
For a socket setup specifically, magnetic labels are the smartest choice.
The Custom Magnetic Toolbox Drawer Labels from Automotive Accessories come in a set of 8, covering a full socket setup. You customize the text yourself so you can write exactly what your drawer holds, whether that’s “1/2 SAE Deep” or “3/8 Metric Impact,” and choose the font and color that works for your setup. They pair especially well with other organizers where quick tool access matters.
They’re made from durable PLA, hold firmly without falling during normal use, and can mount cleanly without leaving adhesive residue on steel or metal drawer fronts. Embedded magnets help the labels stay in place on steel surfaces.
If you want the full breakdown on why printed magnetic labels are one of the best fixes for a disorganized toolbox before you order, that post covers it in detail. And if you want to understand the labeling process itself, where to place them, how to size them, what to avoid, this guide on how to label toolbox drawers the right way walks through the whole thing.
Conclusion
Getting organized is the easy part. Staying organized is where most people slip, and with sockets, it happens faster than you’d think because they’re small and easy to set down without thinking.
The one habit that holds the whole system together is putting the socket back the moment you’re done with it. Not at the end of the job. Not when you’re cleaning up. Right when you’re done using it, so you can complete the job faster the next time. Three seconds now versus three minutes of searching later. The math is obvious, but it’s easy to ignore when you’re in the middle of something.
A quick five-minute scan once a week helps too. Open each drawer, check that everything is where it should be, and put back anything that’s drifted. If a socket has lost its spot, give it a home right then instead of leaving loose sockets behind or undermining long-term socket storage
Once the labels are in place and the habit is established, the system runs itself. You stop searching, and you start reaching, which is exactly the point. Good storage habits help protect your setup.